
Windows 11 offers a modern user experience with enhanced security features, but like any operating system, it collects data to improve user experience and provide personalized services. However, users concerned about privacy may want to take extra steps to configure advanced privacy settings.
This article explores the best Windows 11 privacy settings to enable, ensuring you have greater control over your data.
To minimize the amount of data that Windows 10 (or newer versions like Windows 11) shares with Microsoft, you can take several steps to control telemetry and protect your privacy. While it’s nearly impossible to stop all data collection entirely, following these guidelines will help you significantly reduce it.
Best Windows 11 Privacy Settings to Enable:
Configuring Privacy as Soon as You Buy a Laptop
The first opportunity to manage your privacy on Windows comes during the Out of Box Experience (OOBE)-the initial setup phase. While it might not seem significant, this is your first chance to decide what data you share with Microsoft and minimize unnecessary data collection. The good news is that you can control what you choose to share.
Steps to Configure Privacy During Setup:
- Location Services: You’ll be asked if you want to allow Microsoft and apps to access your location. While enabling this provides convenient services like weather updates and local information, you also have the option to turn it off and manually configure apps as needed. However, enabling location services allows you to track your device through your Microsoft account, which can be useful in case of loss or theft.
- Diagnostic Data (Telemetry): You can opt to send only the required data or share optional, more detailed data. For stronger privacy, it’s best to select the option to send only mandatory data.
- Typing and Handwriting Recognition: Microsoft uses small, anonymized fragments of text input to refine its system, but you can decide whether or not to share this data.
- Personalized Experiences Based on Diagnostic Data: If activated, Microsoft creates an advertising ID linked to your activity, allowing the company to offer more relevant content. If you prefer not to share, you can opt-out.
By paying attention to these options during setup, you can take important steps toward maintaining control over your data and enhancing your privacy on Windows.
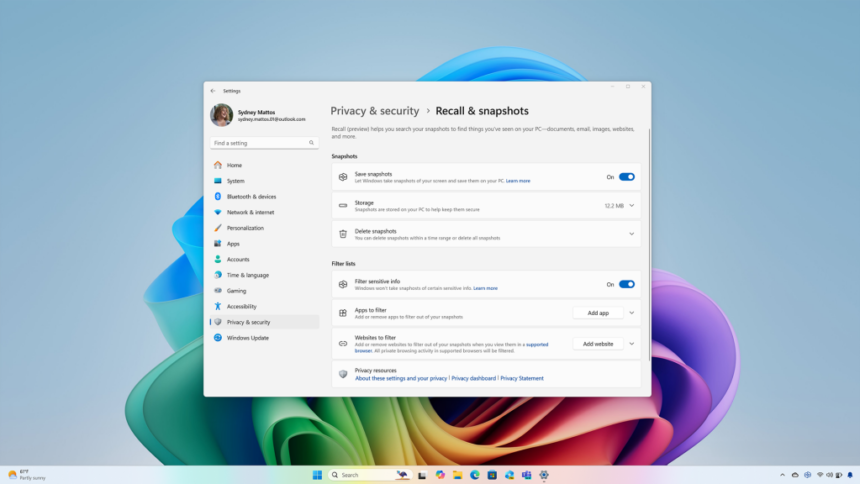
Configuring Advanced Privacy on Windows 11
Configuring Privacy After Setup
If you didn’t focus on these privacy settings during the initial setup, don’t worry-you can always adjust them later. If you change your mind, for better or worse, you can easily revisit these settings by going to Settings > Privacy & security.
This section gives you full control over your device’s privacy settings, allowing you to manage what data you share. Microsoft has made it straightforward to review and update your privacy preferences whenever you want.
1. Disable Telemetry and Data Collection
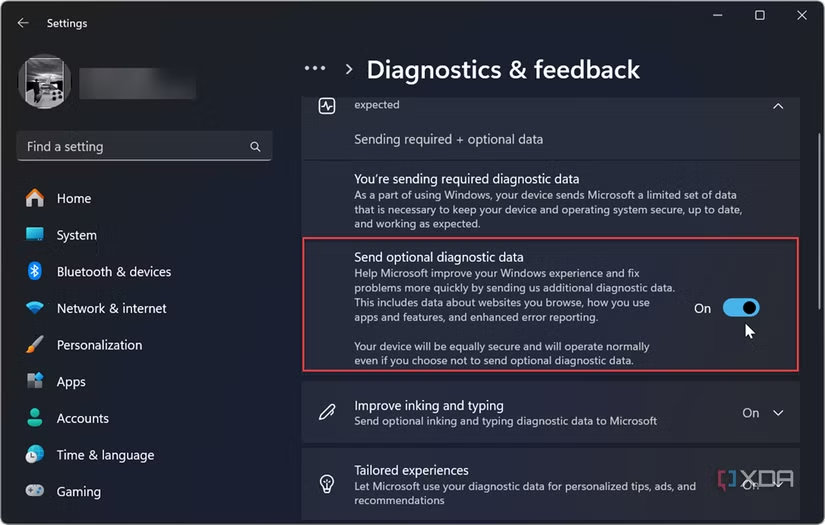
Microsoft collects diagnostic data to improve Windows functionality. However, you can limit or disable this:
Steps to Disable Telemetry:
- Open Settings (Win + I) and navigate to Privacy & security.
- Select Diagnostics & feedback.
- Under Send optional diagnostic data, toggle it off.
- Scroll down to Tailored Experiences, View diagnostic data, and turn them Off.
To further restrict telemetry, use the Group Policy Editor (only available in Pro editions):
- Press Win + R, type
gpedit.msc, and hit Enter. - Navigate to:
Computer Configuration > Administrative Templates > Windows Components > Data Collection and Preview Builds. - Double-click Allow Telemetry, set it to Disabled, and apply changes.
2. Adjust Location Settings
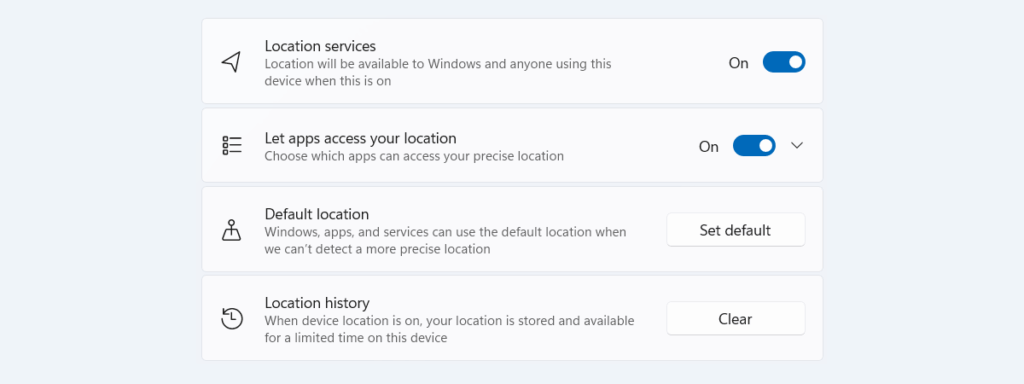
If you don’t want Windows or apps tracking your location, disable it:
Steps:
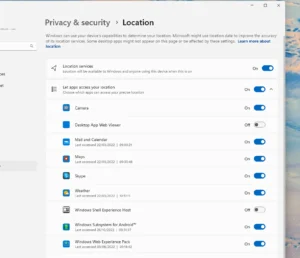
- Go to Settings > Privacy & security > Location.
- Toggle Location services to Off.
- Scroll down to Let apps access your location and disable access for unnecessary apps.
3. Manage App Permissions
Many apps request access to your microphone, camera, and contacts. You can control these permissions:
Steps:
- Open Settings > Privacy & security.
- Scroll to App permissions and review settings for:
- Camera
- Microphone
- Contacts
- Messages
- Other sensitive information
- Disable access for apps that don’t need these permissions.
4. Disable Personalized Ads and Tracking
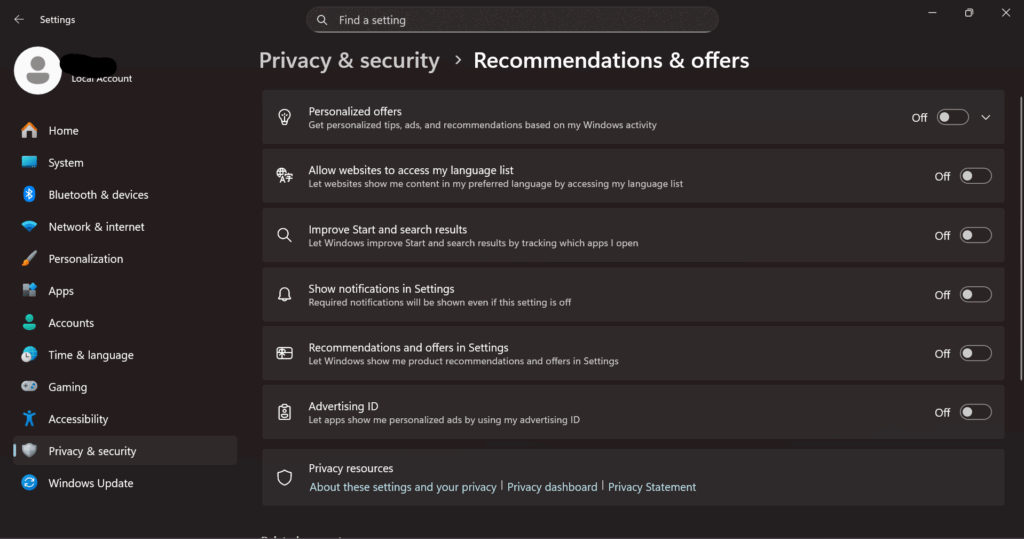
Microsoft uses your data for targeted ads, but you can disable this:
Steps:
- Open Settings > Privacy & security.
- Select General.
- Turn off the following:
- Let apps show me personalized ads by using my advertising ID
- Let Windows improve Start and search results by tracking app launches
- Show me suggested content in the Settings app
Additionally, visit Microsoft’s Ad Preferences to opt out of personalized ads in your browser.
5. Configure Microsoft Account Privacy Settings
If you use a Microsoft account, configure its privacy settings:
Steps:
- Visit Microsoft Privacy Dashboard.
- Review and delete activity under:
- Browsing history
- Search history
- Location history
- App and service usage
6. Disable Cortana (If Not Used)
Cortana collects voice and search data, which you can disable:
Steps:
- Open Settings > Apps > Apps & features.
- Search for Cortana and select Advanced options.
- Toggle Microphone access and Run at log-in to Off.
7. Enable DNS over HTTPS (DoH) for Secure Browsing
To encrypt DNS queries and improve privacy:
Steps:
- Open Settings > Network & Internet> Advanced network settings.
- Select More network adapter options.
- Right-click your active network and choose Properties.
- Select Internet Protocol Version 4 (TCP/IPv4) > Properties.
- Change the Preferred DNS server to
8.8.8.8(Google) or1.1.1.1(Cloudflare). - Enable DNS over HTTPS (DoH) in your browser settings.
8. Configure Windows Defender Privacy Settings
Windows Defender shares threat information with Microsoft. If you prefer more privacy:
Steps:
- Open Windows Security (search for it in the Start menu).
- Click Virus & Threat Protection> Manage settings.
- Disable Automatic sample submission.
- Under Cloud-delivered protection, toggle it Off if you want more control over data sent to Microsoft.
You can significantly reduce data collection and enhance your control over personal information by enabling these best Windows 11 privacy settings and configuring advanced privacy options. While some settings may reduce certain features’ functionality, they help maintain higher privacy and security.


 shares with Microsoft, you can take several steps to)