
“USB Device not recognised” is a dreaded message that every PC owner hates to see, as it usually means that it’s time to dig into your pocket and get a new device. However, don’t be quick to loosen the purse strings just yet as a lot of the time the problem could be down to a simple software, operating system, or driver glitch that you can easily remedy without seeking a replacement.
Read on to find out how to solve the USB not recognised ” error and salvage an otherwise functional USB device.
How to Fix USB Device Not Recognised Error in Windows
1. Update your drivers
90% of the time, this error message is down to a missing or outdated driver, and therefore Windows can’t understand the connection and hence does not recognise the USB device. Updating your drivers is a good way to ensure that that is not the case, and you can do so as follows:
1. Open the start menu and look up “Device Manager” in the search panel, then click on through to the subsequent page, which should bring up a list of various adapters and devices.
2. Scroll down to the furthest option titled “Universal serial bus controllers” (or something similar, depending on your version of Windows; this is from a Windows 10 perspective), then expand the directory by clicking on the said name.
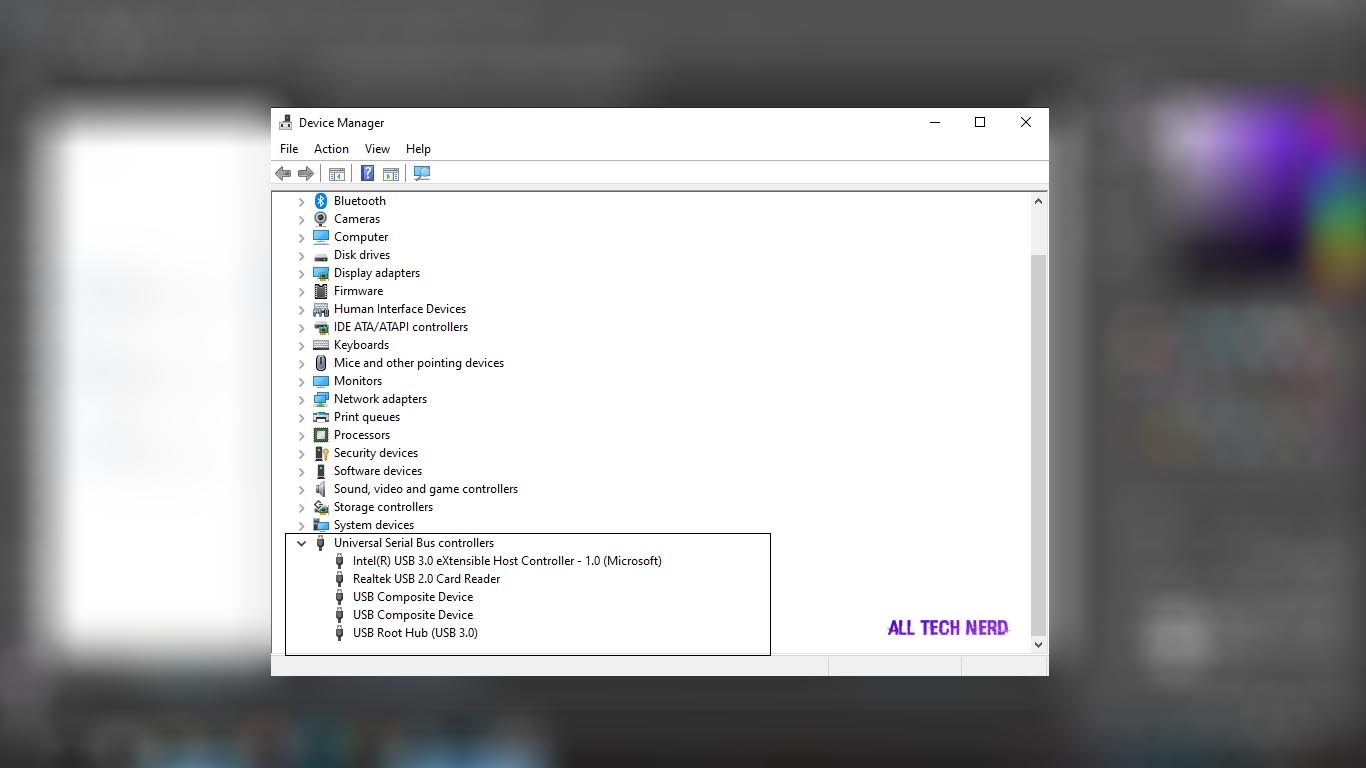
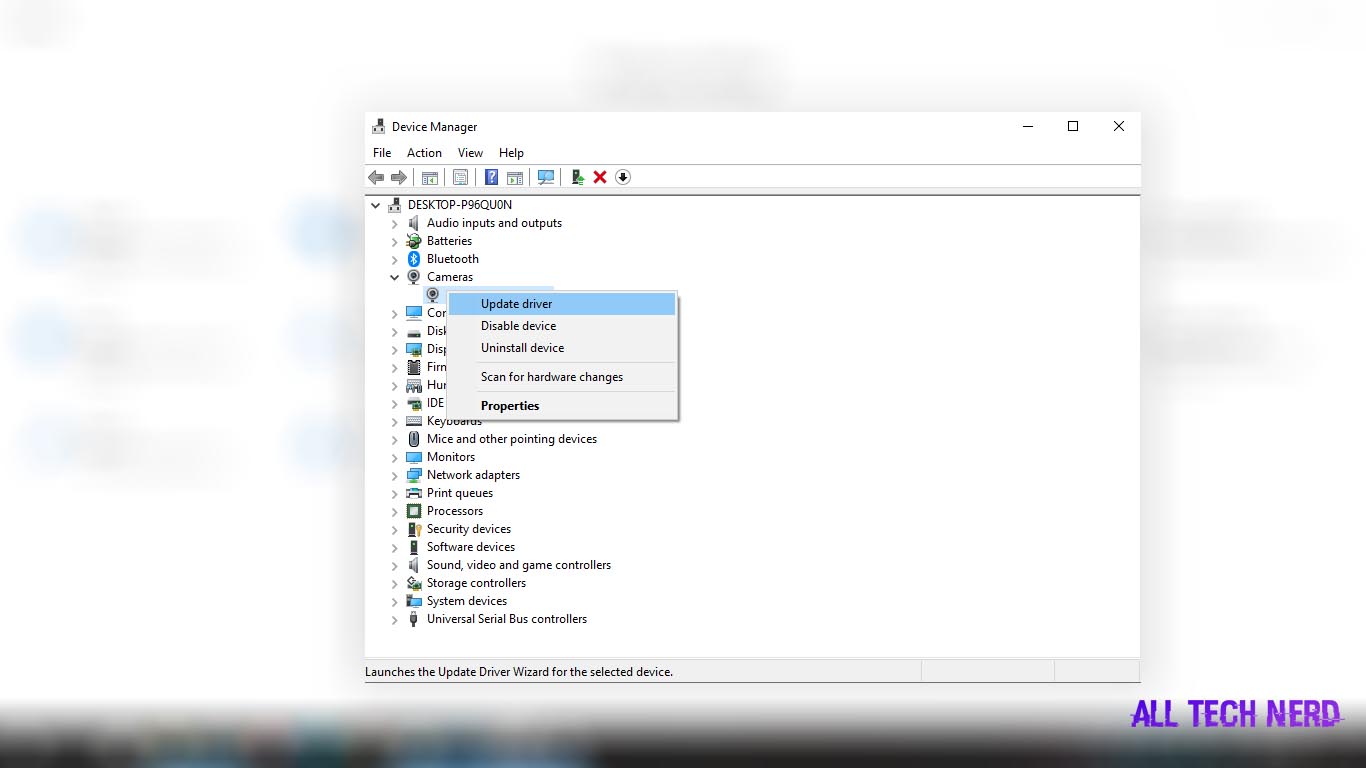
3. Upon doing this, a drop-down list will appear portraying the various states of the USB ports and the devices connected to them. Look for the one labelled “Unknown Device”, then double click on it to conjure another subpage consisting of five tabs, namely “General”, “Driver”, ”Details“, “Events”, and “Power Management” in that order.
4. Navigate to the “Driver” tab, then hit the “Update Driver” button to update the software. You will be presented with two alternatives: either source the update locally from your computer or automatically download it from the internet. Choose the latter.
If that doesn’t work, you can download the update directly from the manufacturer’s website, ensuring you use the exact USB device model.
2. Uninstall hidden devices
Sometimes, the error can also be caused by the operating system’s tendency to conceal unused devices, only displaying those in use, thereby causing this conflict.
In this case, you need to make public hidden devices by eliminating useless devices to free up space, and here’s how you can do just that:
- Navigate to the command prompt by searching for the word “cmd” in the Start panel, then highlighting the similarly named application file (cmd.exe). Right-click on it, then select “Run as Administrator”
- Once the black screen pops up, you’ll need to key in the following commands exactly as they appear. It’s better if you copy and paste them to avoid any errors, and be sure to press “Enter” after each of the following three lines of code:
- set DEVMGR_SHOW_DETAILS=1
- set DEVMGR_SHOW_NONPRESENT_DEVICES=1
- start devmgmt.msc
- The above will take you to a hidden side of the Device Manager, which includes an option to “Show hidden devices”. Uninstall any unknown devices (those that are greyed out) until the problematic device is removed, and then reinstall a new one when you plug it in again.
Other Possible Solutions
Since the root cause of your malfunctioning USB device spans several reasons, there are also many other remedies you could try out should the aforementioned two fail. The most effective being:
Unplugging your computer
If you’re lucky, your solution could be as simple as turning off your computer and then restarting it. This doesn’t mean using the “shut down” button, but rather disconnecting your PC from the power source altogether so as to force a “hard reboot” of the motherboard, whose hardware- including USB ports- tends to work incorrectly from time to time.
Doing so will cause a reload of the USB ports and their associated drivers, and hopefully resolve your problem. Remember to follow proper “shut down” procedures first, i.e. shutting down via Windows routines lest you damage the motherboard. For a laptop, you’ll need to remove both the power cord and the battery to completely eliminate any sources of power.
If none of the above methods worked and you’re still getting the “USB drive not recognised” message, you could try turning off the USB selective suspend settings that can be found under “USB settings” from “Change Plan Settings” which you can get to by typing in “power plan” in the Windows search box.
Alternatively, try switching to another USB port, as the current one could simply be damaged. Lastly, rescanning devices via the Device Manager menu can also be effective.


