

Changing the Windows Administrator account is essential for managing your computer’s security and user permissions. This guide will walk you through changing the administrator account on your Windows system, whether you need to rename it, change its password, or create a new administrator account. We’ll cover methods suitable for various versions of Windows, including Windows 10 and 11.
How to Change Administrator in Windows 10 and 11
- Go to “Settings”;
- On the left side menu, click on the “Accounts” category;
- Then click on “Other users”;
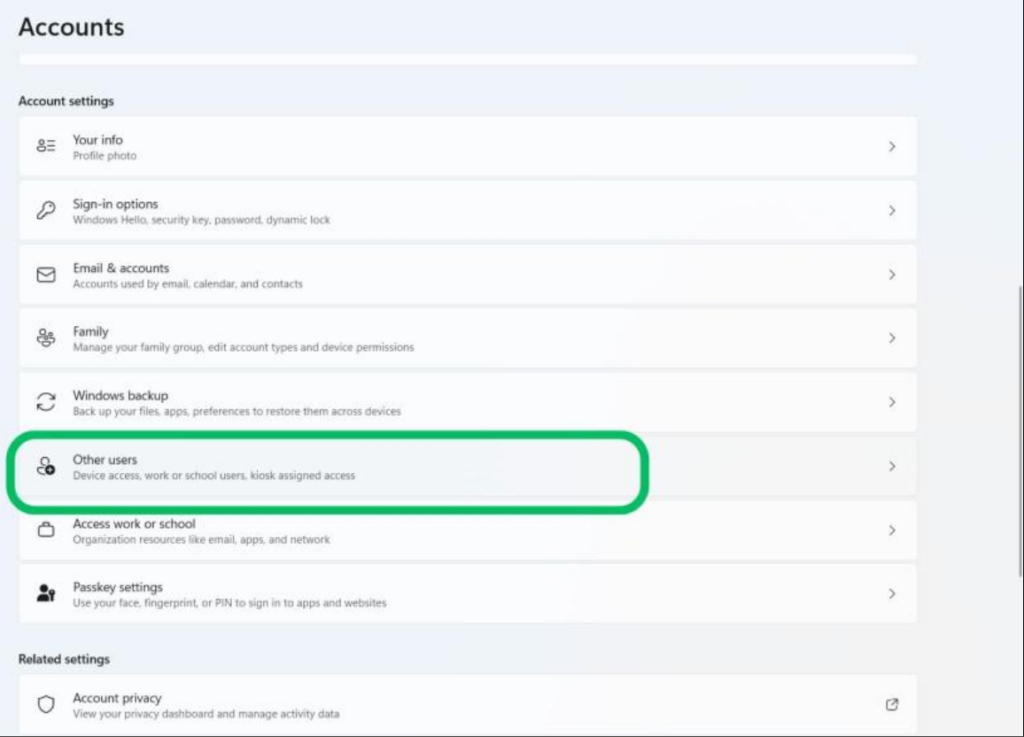
- Then click on the “Change account type” button on the selected user;
- Then mark it as “Administrator” and click “Done”.
How to Change Administrator in Windows 7
- Open the “Control Panel”;
- Click on the “User Accounts” category;
- Then click on “Change Account Type”;
- On this page, you can view all available users;
- Select the desired user and click “Change Account Type” again;
- Finally, check the “Administrator” option to complete the action.
Once this is done, restart your computer to save the new administrator settings.
Changing your Windows Administrator account is a straightforward process that enhances your system’s security and management capabilities. Whether you’ve modified an existing account or created a new one, remember to use strong passwords and limit administrative access to maintain system integrity. Regularly reviewing and updating your administrator settings is a good practice for ongoing computer security. With these changes, you’re better equipped to manage your Windows system effectively.


