

macOS is a system that has several features that make the user’s life much easier from simple tasks, like previewing a file through the Finder or editing videos using native editing tools.
You can also natively convert an image to a different format on your Mac – without installing any additional applications. Following this process is quite simple, and it supports the following formats whether you received the image through WhatsApp, downloaded it from a web browser, or exported it from the Photos app:
- HEIC
- JPEG
- JPEG – 2000
- OpenEXR
- PNG
- TIFF
The variety is excellent. So, check out our step-by-step below and learn how to convert images on Mac without installing any applications.
How to Convert Images on Mac
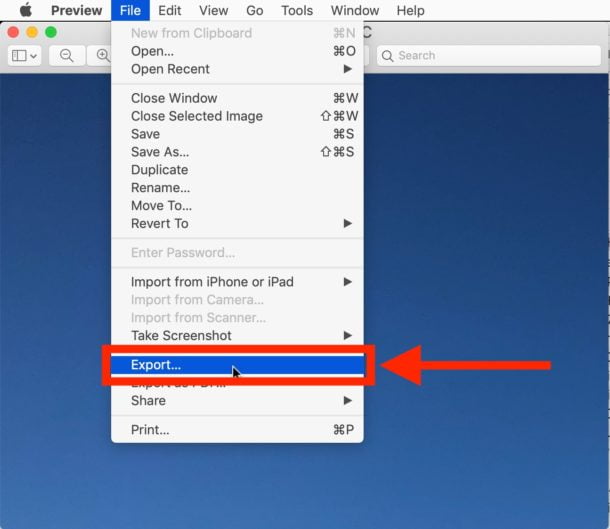
1. Open the image you want to convert in “Preview.” Then in the menu bar, go to “File” > “Export.”
2: Under “Where,” you can choose the location to export the file. Then open the drop-down menu under “Format” and select the format you want to export the image.
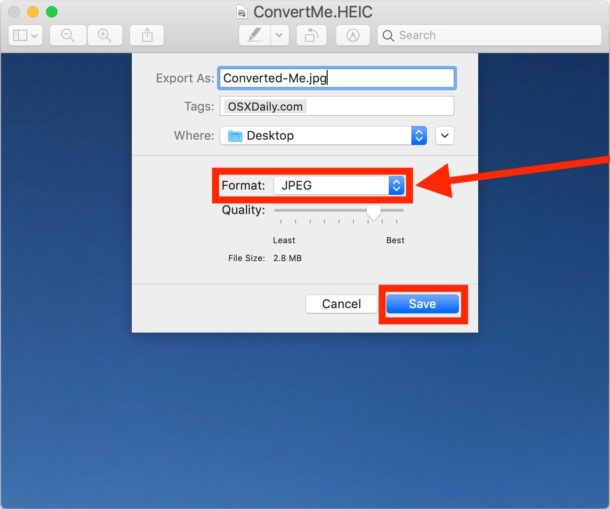
Step 3: Click “Save” to finish exporting in the desired format. Remember that a new file will be created, so the original format will still be maintained.
With this, You are done. The Preview App on Mac is an incredibly useful tool for converting images quickly and easily. Even if you are a beginner using your Mac computer, it should not take more than a few minutes to figure out how to use this app properly. With just a few clicks of your mouse, you can convert images from one file type to another quickly!


