
Microsoft’s latest operating system introduces exciting new features, including a dedicated widget section, seamless integration with Android apps, and a customizable start menu reminiscent of Windows 10.
If you want to personalize your start menu and make it your own, you’ll be pleased to know it’s a quick and convenient process. You can pin your most frequently used apps, rearrange their positions, and showcase frequently opened files. With these customization options, your start menu will reflect your unique preferences and needs.
Advertisements
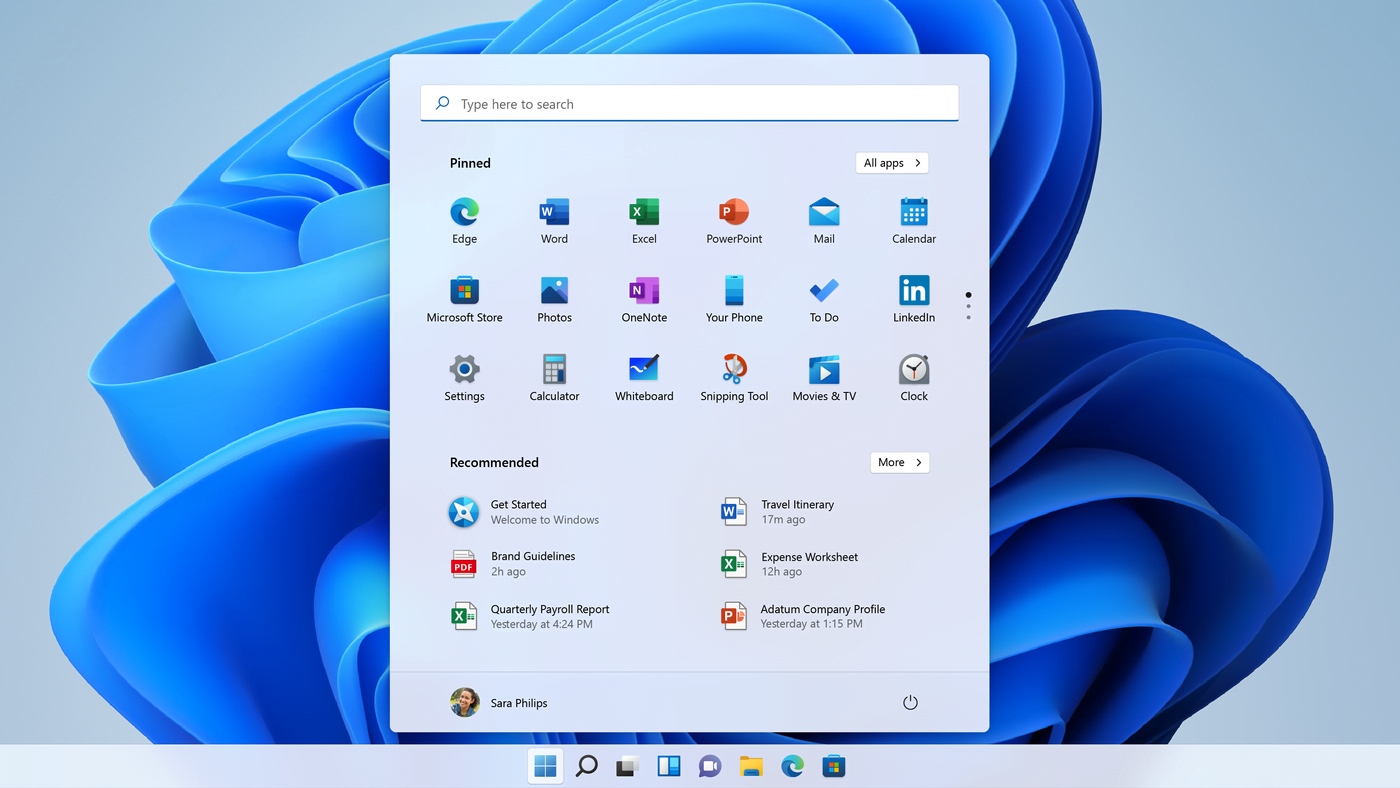
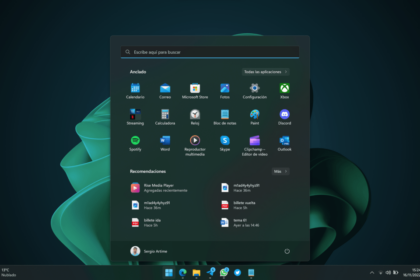
How to Customize the New Start Menu in Windows 11
Adjust which icons can be pinned to the start menu
- Open the start menu and click “All apps.”
- Locate the app you want to pin, right-click on it, and select “Pin to Start.”
- Press and drag an icon to adjust its new position.
- Right-click an app and select “Unpin from Start” to remove it from the pinned section.
Adjust what information is displayed in the start menu
- Open the “Settings” of Windows 11 through the shortcut “Windows + I”, access the “Personalization” tab in the left menu, and click on “Start.”
- Enable or disable the options that allow you to show recently installed apps, which apps are most used, which files you have opened recently, or adjust which folders will be next to the “On/Off” button.
- Select and activate which icons will be available in the start menu.
- All the icons you have enabled will be available next to the “On/Off” button.
Let the start menu on the left side of the screen.
With the update, the Windows 11 start menu is now displayed in the center of the screen, not in the left corner, as in Windows 10.
- To place it again on the left, right-click the Taskbar and access its settings.
- Expand the “Taskbar behavior” option and switch from “Center” to “Left.”
This will position the taskbar on the left side of the screen.
Advertisements


