
Did you know Macs have a built-in zoom feature that makes things on the screen bigger? It’s super helpful for folks who might have trouble reading small text. But not many people even realize it’s there!
Once you turn on Zoom in your Mac’s settings, you can zoom in on stuff in different ways:
- Make the zoomed part take up the whole screen.
- Split the screen so one half is zoomed.
- Use a little picture-in-picture zoom box that hovers over part of whatever you’re looking at.
I’ll walk you through how to switch on Zoom and start using it. It only takes a few simple steps to get it going!
So if you ever struggle to see what’s on your Mac or get headaches squinting at tiny fonts, try the zoom tool. It’s built right in to make things more visible for you. It’s a pretty cool accessibility feature that too few folks use if you ask me!
How to Enable and Use Accessibility Zoom on Mac
1. Open your Mac’s System Preferences and enter “Accessibility”.
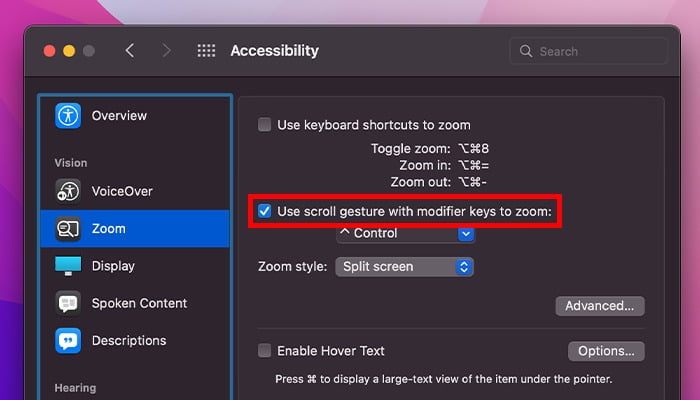
2. In the left sidebar, find “Zoom” to open the feature settings.
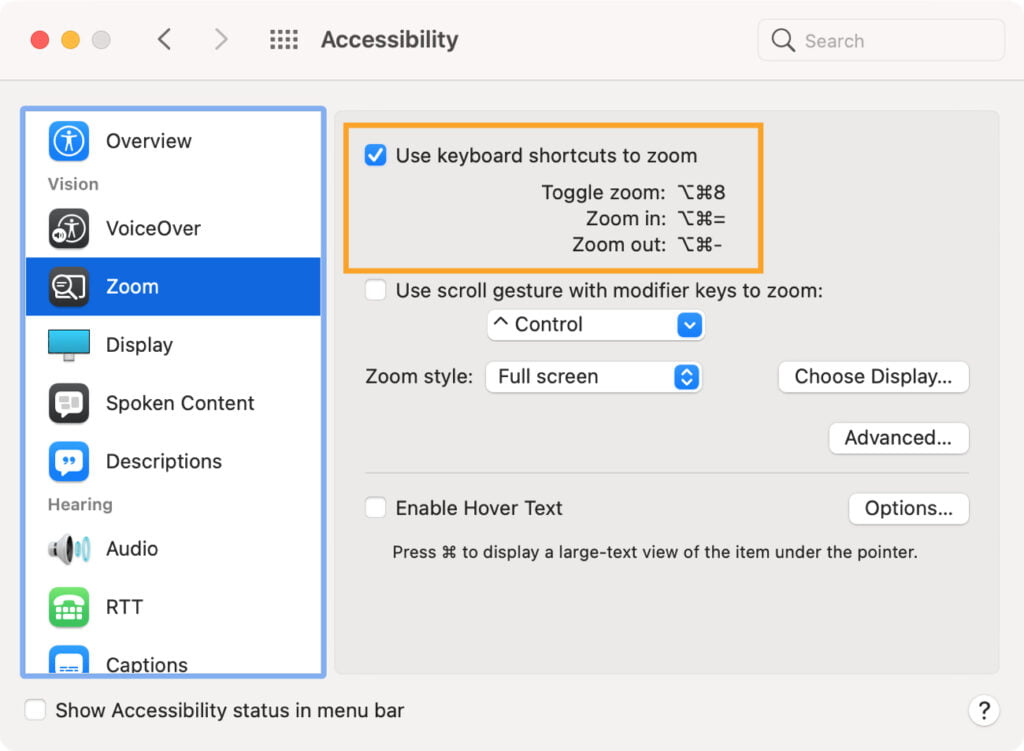
3. Enable the zoom keyboard shortcuts option at the top of the window. These will be the shortcuts for using the resource on your machine:
- ⌘ Command + ⌥ Option + equal sign (=) key: zooms in to where the cursor is stopped on the screen.
- ⌘ Command + ⌥ Option + minus sign (-) key: zoom back out.
- ⌘ Command + ⌥ Option + numeral 8 key: switches between zooming in and out more quickly.
4. Enable scroll gestures with a keyboard shortcut key in the option below.
5. If the default key option is incorrect, click on the field to select it from the three key options.
6. In the field below, “Zoom Style,” you can change how the zoom feature is applied to the screen between the options to fill the entire screen, split it into two areas, or use a picture-in-picture format.
7. Finally, you can activate the “Hover Text” functionality to visualize better the texts the mouse cursor passes over on the screen.
8. If you prefer, click to open and adjust the text options under the cursor according to your preferences, such as font size, font color, and a series of other possibilities.


