
You may have gotten an error called 0x80070643 when trying to install the newest Windows 10 security update. This error stops the installation of the KB5034441 patch from finishing. This patch fixes an important problem in the Windows Recovery Environment, also called WinRE. WinRE is used to repair, restore, or reinstall Windows if there are failures in the system.
The 0x80070643 error happens because the WinRE partition lacks free space. Microsoft says this partition needs at least 250 MB of free space to install the KB5034441 patch. If not, the update will fail and show the 0x80070643 error code.
But don’t worry, there is a way to fix this and install the Windows 10 security update. Just follow these steps:
Fix Error 0x80070643 When installing Windows 10 KB5034441
1: Deactivate WinRE
The first thing you have to do is deactivate WinRE to be able to modify the recovery partition.
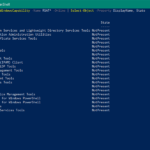
- Open an elevated command prompt:
- Search for “cmd” in the Start menu.
- Right-click on the “Command Prompt” result.
- Choose “Run as administrator.”
Once you have the command prompt open, run the following command:
reagentc /info

This command will show you information about WinRE, including its location. If WinRE is installed, you will see a “Windows RE Location” line with a path. For example:
Windows RE location: \\?\GLOBALROOT\device\harddisk0\partition3\Recovery\WindowsRE
If WinRE is not installed, you will see a message that says, “Windows RE is not enabled on this computer.” In that case, you can skip this step and go to the next one.
If WinRE is installed, you will have to disable it with the following command:
reagentc /disable
This command will disable WinRE and show you a message that says, “Operation completed successfully.” Now, you can move on to the next step.
2: Resize the recovery partition
Now, you need to make the recovery partition bigger so it has at least 250 MB of space left. To do this, you’ll use a tool called diskpart. You can open diskpart from the same command prompt by typing in the following command:
diskpart
This command will open a new window with the command and DISKPART> prompt. From here, you can execute the following commands:
list disk
This command will display a list of all the disks connected to your computer. You need to determine which disk holds your operating system (OS) and remember its index number. For instance, if the disk with the OS is labeled as disk 0, its index number will be 0.
sel disk
This command lets you choose the disk that holds the operating system (OS). You must replace `<number>` with the index you noted in the previous step. For example, if the index is 0, the command will be:
sel disk 0
This command will show you a message that says “Disk 0 is now the selected disk.”
list partition
This command will display a list of the partitions on your selected disk. You’ll need to find the partition that holds the operating system (OS) and remember its index number. For instance, if the partition containing the OS is labeled as partition 4, its index number will be 4.
sel part
This command permits you to choose the partition that contains the operating system (OS). You must replace `<number>` with the index you noted in the previous step. For example, if the index is 4, the command will be:
sel part 4
This command will show you a message that says, “Partition 4 is now the selected partition.”
shrink desired=250
This command will allow you to reduce the size of the selected partition by 250 MB. This space will be freed up to create a new recovery partition. The command will show you a message that says “The volume size has been reduced by 250 MB.”
Select and remove the old WinRE by running the command:
sel part
And then execute the command
delete partition override
This command will allow you to format the new partition with the NTFS file system, assign it the “Recovery” label, and do it quickly. The command will show you a message that says “The volume has been formatted successfully.”
assign letter=R
This command will allow you to assign the letter R to the new partition. The command will show you a message that says “The drive letter or mount point has been assigned.”
exit
This command will allow you to exit the diskpart tool and return to the original command prompt.
3: Activate WinRE
This command will show you the list of disks on your computer again. You must check if your disk is GPT (GUID Partition Table) or MBR (Master Boot Record). To do this, check if there is an asterisk
in the “Gpt” column.
list disk
If you see the asterisk, the disk is GPT.
If you don’t see the asterisk, the disk is MBR.
Depending on the type of disk, you will have to use some commands or others:
For GPT, use the following commands:
create partition primary id=de94bba4-06d1-4d40-a16a-bfd50179d6ac
After running the above command, run:
gpt attributes =0x8000000000000001 For MBR, run create partition primary id=27
- and follow these steps: Format the new partition:format quick fs=ntfs label=»Windows RE tools»
- . Check the new partition with list vol and exit diskpart withexit
- . Reactivate WinRE withreagentc /enable
- . Confirm the installation of WinRE withreagent /info
. In some cases, the error may appear as “Windows RE image not found”
- during the reagentc /enable process. Fortunately, it is possible to fix the error by mounting the Windows image from the ISO, copying the necessary files and re-enabling the recovery agent:
- Download a Windows 10 ISO file and mount it to a drive. Open the command prompt as administrator and run the command:
- reagentc /disable Create a new directory to mount the Windows image. Use this command:
- md c:\WinMount
Run the following command to mount the image: - dism /mount-wim /wimfile:E:\Sources\install.wim /index:1 /mountdir:C:\WinMount /readonly
Copy the recovery files from the mounted image to your system. Use this command: - xcopy C:\WinMount\Windows\System32\Recovery\*.* C:\Windows\System32\Recovery /h
Set the recovery image path using: - reagentc /setreimage /path C:\Windows\System32\Recovery /target C:\Windows
Finally, re-enable the recovery agent: reagentc /enable
We hope these tips and this tutorial have helped you solve Windows 10 installation problems. You can tell us in the comments if it worked.


