
Audio devices such as microphones and webcams have gained a prominent position in Windows 10. In Microsoft’s latest operating system, automatic recognition of internal and external devices has made life easier for even the most layman.
But what about when the microphone starts to have problems, not playing the desired audio or not being triggered as it should? With that in mind, we’ve prepared a tutorial with a few simple steps that don’t require technical knowledge and that you can solve the situation yourself.
What did Windows 10 do so new?
To begin, it is important to know some aspects of the new operating system from Microsoft: first, it brings all the device management options present in its predecessors. The device management menu is still alive, but some options can be tried first.
However, Windows 10 brings some options that are permeated throughout the system (system wide settings), and that could be impacting the performance or, in the worst case, the functioning of your microphone. If, for whatever reason, you have disabled it or denied it permission by an app, it could be that the system has understood this as a general command.
This is due to Microsoft’s greater focus on user privacy in Windows 10. In order to prevent certain applications from being able to access or capture your audio without your proper permission or knowledge, the company has created new management formats for which may or may not be done via the system.
Okay, so what do I need to do?
The first thing to do is verify that the use of your microphone is allowed by the operating system. Windows 10 normally separates installed apps between “desktop” and “store apps” (referring to the Microsoft Store). If for some reason, microphone access is disabled, neither of you will be able to use it.
To do so, open the Start menu and click on the “Settings” menu symbol (it is the gear-shaped drawing in the lower left corner). Alternately, simultaneously press the “Windows” and “I” buttons on your keyboard to open the same menu.
Once in it, click on the “Privacy” icon and, in the side menu on the left, select “Microphone”. At the top of the window, ensure the message “Microphone access for this device is enabled” appears. If anything other than this is in sight, click “Change” to correct.
Just below, also confirm that the option “Allow apps to access your microphone” is enabled. Otherwise, no installed software can recognize, trigger and capture anything by it.
After that, we enter a game of cat-and-mouse, in which you will have to check, in the same menu under the area that says “Choose which apps can access your microphone”, which are the applications that are allowed to use the device one by one. Make sure the app you want has the proper permission.
It is worth mentioning that traditional desktop apps are not included in this list, composed only of software downloaded from Microsoft’s virtual store. Desktop programs will always access your computer’s microphone, assuming the general access option we discussed above is turned on.
This is usually where your problem is solved, as it is quite common that access to the microphone is cut off due to a user error or a derivative command of Windows. However, there are cases where this does not solve the problem.
I still don’t have a microphone. And now?
If the previous tip didn’t fix your problem, then it’s time to do the “path of stones”. The first thing to do is also the most obvious: if you have an external microphone (like a gaming headset, for example), is it plugged in correctly?
In the case of wired devices, are they in good condition, and are any connectors bent or misaligned? If it’s a Bluetooth device, does the connector work? Do you have enough battery charge?
It is interesting that you confirm all this and, if applicable, remove and reconnect all connectors and, who knows, restart the machine.
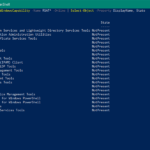
Let’s skip the obvious to the more laborious options: first, open the Windows device manager. In Windows 10, you can do this in two ways: the first and simplest is to right-click on the “Start” menu symbol and select the “Device Manager” option. The other is to simultaneously press the “Windows” and “R” keys and type “devmgmt.msc” (without the quotes).
Inside the manager, you must confirm that the microphone (the device, not access to it, as in the previous step) is enabled. You must find the option corresponding to the microphone and access it. Generally, such settings can be accessed within the expandable menu “Audio Inputs and Outputs”, just below “Headphones.”
This is also true for built-in microphones, such as in notebooks. Right-click on the corresponding option and see the options: if “Enable this device” or something similar appears, your microphone is not configured. If “disable…” is displayed, then your microphone is already recognized by Windows 10.
Still in this menu, take the opportunity to click on the option to update the microphone drivers: normally, Windows 10 tries to automatically install and update the working drivers of any connected device, whether integrated or linked to a USB port. Sometimes, however, this process stalls and must be “forced” manually. Many hardware malfunctions-including microphones-can be resolved with a simple upgrade.
Nothing yet: what’s the next step?
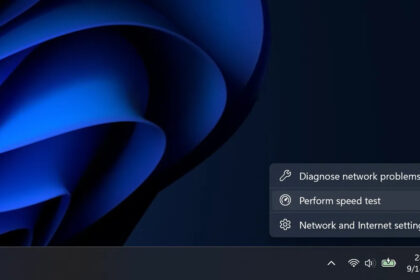
Faced with a picture where, despite everything you’ve read so far, your microphone still doesn’t work, so let’s try another option: you see the Windows sound and volume icon, in the lower right corner of your screen, in the Tasks. Right-click on it and select the “Sounds” option. Then, click on the “Recording” tab in the opened window.
From here, we have to confirm two things: the first is that the default Windows 10 audio playback and capture device is the one you want. This is especially necessary if you have a notebook with a built-in microphone and plug in another external microphone (via USB). Faced with two devices of equal function, the operating system can get confused and point to one or the other.
After making sure that the device is right for what you need, it’s time to test how it works: on that same screen, speak aloud or, if a headset is being used, speak with it in the ears and with the audio output close to your mouth. You will see the green bars moving (indicators of the volume captured), indicating that the microphone is working correctly.
I’ve updated the drivers, and everything is in order, but the microphone still doesn’t work.
If in the face of all this, you are still having problems with audio playback and capture, we still have one last resort. However, this one is a little more uncertain: the desired application may be selecting the wrong device or not finding any device at all in the first place. Place.
The situation is a little more uncomfortable: especially in cases with multiple audio capture capabilities. The software may simply be pointing at the wrong microphone. So, open the app of your choice and search its settings for camera selection and management options. In Skype, for example, the path is “Menu > Settings > Audio and Video.”
However, it is important to point out that this option may or may not work, depending on the microphone models supported by the desired software. Microsoft has confirmed that some models supported on Windows 7 will not work on Windows 10. The aforementioned Skype is also somewhat selective regarding cameras and microphones. If your device does not appear in the settings menu, it may just be that the application does not support it, forcing you to choose another software.
Did it go bad: time to call the IT guy?
Yes. If none of the previous steps has helped your life, then it’s time to call in external and specialized services. Chances are your microphone has hardware issues. Typically, this means contacting the product manufacturer and seeking maintenance information for regular users. If your device is under warranty, great: the manufacturer will be able to guide you through repairing or purchasing a new model free of charge.
In the case of corporate devices (like a laptop your company has given you), things tend to be more complicated. Large companies tend to install protective measures in using their devices, which can allow, among other things, a microphone to be remotely enabled/disabled. In this case, contact the responsible IT department, and they will be able to guide you according to your company’s policies.
Have a problem and can’t solve it? Or are you interested in tutorials on a specific subject? Tell us in the comments, and we’ll get the information you need to publish a very in-depth article on what you’re looking for!


