Do you find your Chromebook running slower than it used to?
Does it feel like it’s lost that zippy performance you enjoyed when it was brand new? If so, formatting your device might be the solution you need.
Over time, all computers and devices experience some degree of performance degradation. This can happen for various reasons, such as high memory usage, limited storage space, software updates, or even hardware aging. However, pinpointing the exact cause of sluggishness can be tricky.
That’s where formatting your Chromebook comes into play. Restoring your device to its factory settings is a process that can potentially resolve system issues and bring back that snappy performance you’ve been missing. Manufacturers often recommend this as a go-to solution for troubleshooting and maintenance.
In this article, we’ll guide you through the simple steps to format your Chromebook, giving it a fresh start and potentially reviving its speedy performance.
How to Reset a Chromebook to Initial Settings
Before you start it, it’s important to remember that formatting your Chromebook will erase everything on its hard drive, including all the files in your “Downloads” folder. So, before you proceed with this process, it’s a good idea to back up your data on Google Drive or an external hard drive.
That way, you can ensure you don’t lose any essential files during formatting.
- Log out of your Chromebook;
- Hold down the “Ctrl” + “Alt” + “Shift” + “R” keys;
- Then select “Restart”;
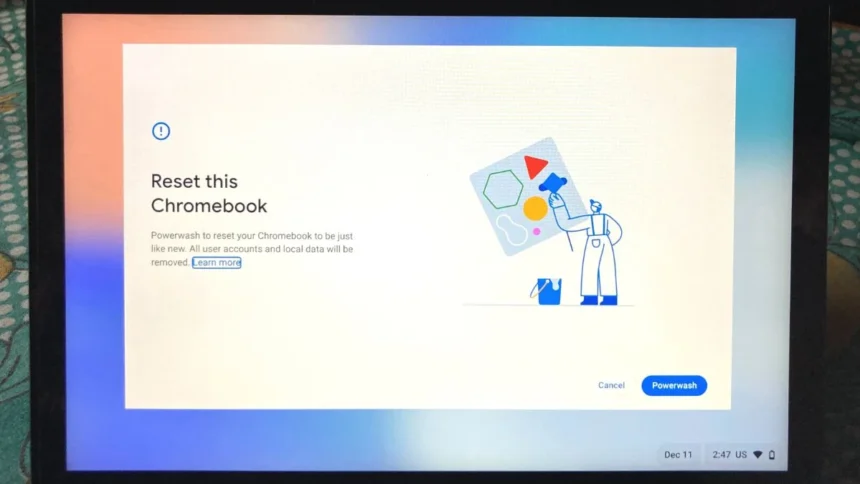
- Then select the “Powerwash” option and click “Continue”;
- Read the next steps and login to your Google account;
- Finally, when your computer starts again, it will reset.
Remember that the Google account you’re logged into will be associated with the Chromebook as its owner. So, if you want to set up a different account as the administrator, log in with that account.
Format a Chromebook
Using the Chromebook’s built-in File Manager
- Plug the USB drive or external storage device into your Chromebook.
- Click on the “Launcher” (the circle icon in the bottom-left corner of your screen).
- Type “Files” in the search bar and open the Files app.
- In the Files app, find your connected drive under the “Devices” section in the left sidebar.
- Click on your external drive.
- Right-click (or use a two-finger tap on the trackpad) on the drive and select “Format device”.
- In the format options, choose exFAT as the file system format.
- Confirm the action by clicking “Format”.
- The Chromebook will format the drive to exFAT, and once completed, your drive will be ready for use with both Windows and macOS.
Using a Linux (Crostini) Environment on Chromebook (Advanced)
If the Files app doesn’t give you the exFAT option, you can use the Linux terminal on your Chromebook to format the drive:
- Open Settings on your Chromebook.
- Scroll down to Linux (Beta) and turn it on if you haven’t already.
- After enabling Linux, open the Terminal from your app drawer.
- Find your external drive’s name (usually something like
/dev/sdbor/dev/sdc). - Type the following command to list the available disks:
lsblk You may need to install utilities to format in exFAT. Type the following commands:sudo apt-get updatesudo apt-get install exfat-utils
- Use the
mkfs.exfatcommand to format the drive. For example, if your drive is/dev/sdb, you would run:sudo mkfs.exfat /dev/sdb1 - Make sure you replace it
/dev/sdb1With the correct device identifier for your drive. - After the process finishes, safely eject the drive using the Files app.
-
That’s it! The drive will now be formatted to exFAT, ready to use across multiple devices.


so you can’t actually reformat the drive in ex-fat on a Chromebook – ridiculous
We have just updated the Article let us know if that works for you 🙂