
Even though Windows 11 is a closed-source operating system, Microsoft has clearly been making strides to better integrate Linux into its ecosystem. Over the past few years, they’ve taken some big steps—like adding support for running Android apps directly on Windows 11.
If you’re thinking about installing Linux on your Windows 11 machine, you’ll need to use WSL 2 (Windows Subsystem for Linux). This feature acts as a bridge, allowing you to run a Linux environment seamlessly within Windows. And if that sounds exciting, you’re in the right place—we’ll walk you through the entire setup process step by step.
What are the requirements for installing WSL 2 on Windows 11?

Before you can install WSL 2 on your Windows 11 device, you’ll need to meet a few basic requirements. First and foremost, you’ll need to be running Windows 11—but the good news is that WSL 2 is also supported on the latest versions of Windows 10.
In addition to that, make sure you’ve got the latest version of the WSL 2 kernel installed. You can easily download it from Microsoft’s official website if you don’t have it yet.
Once you’ve checked off these simple prerequisites, you’ll be ready to move on to the installation steps we’ll cover next.
First, you must enable optional Features
The first step in setting up WSL 2 is to enable a couple of optional Windows features turned off by default. These features are essential for WSL 2 to run properly.
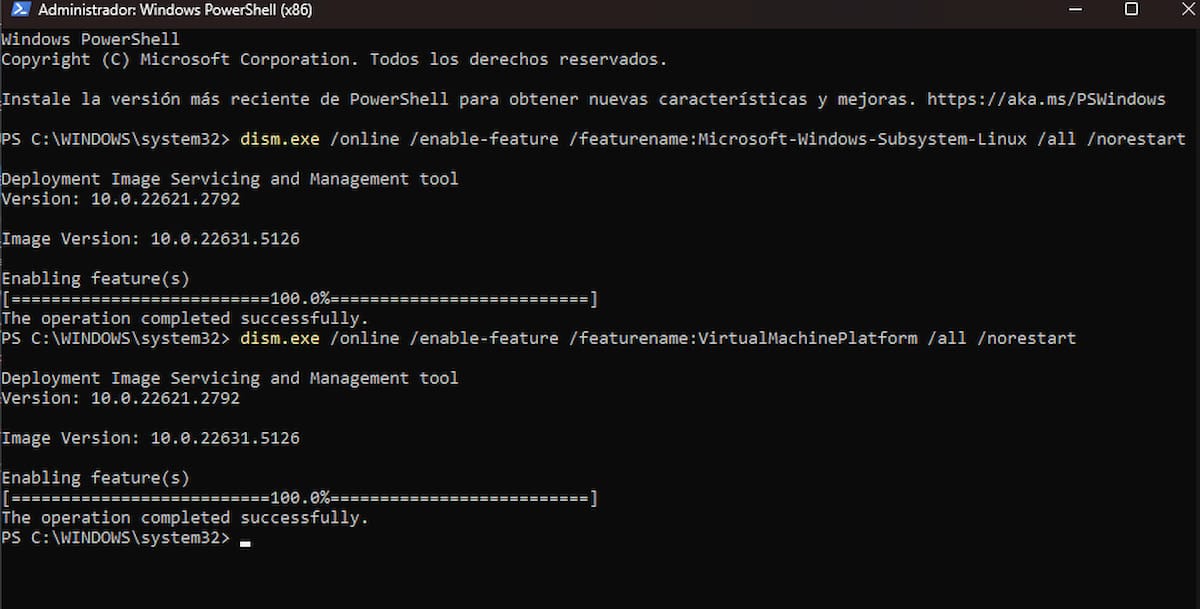
To get started, open PowerShell as an administrator. Once you’ve got the PowerShell window open, enter the following command (without the quotes):
DISM.EXE /online /enable-feature /featurename:Microsoft-Windows-Subsystem-Linux /all /norestart
Next, you’ll need to enable the Virtual Machine Platform by running this second command:
DISM.EXE /online /enable-feature /featurename:VirtualMachinePlatform /all /norestart
Once both commands have been executed, Windows will prompt you to restart your computer. Go ahead and restart to apply the changes.
Install a Linux distribution from Microsoft Store
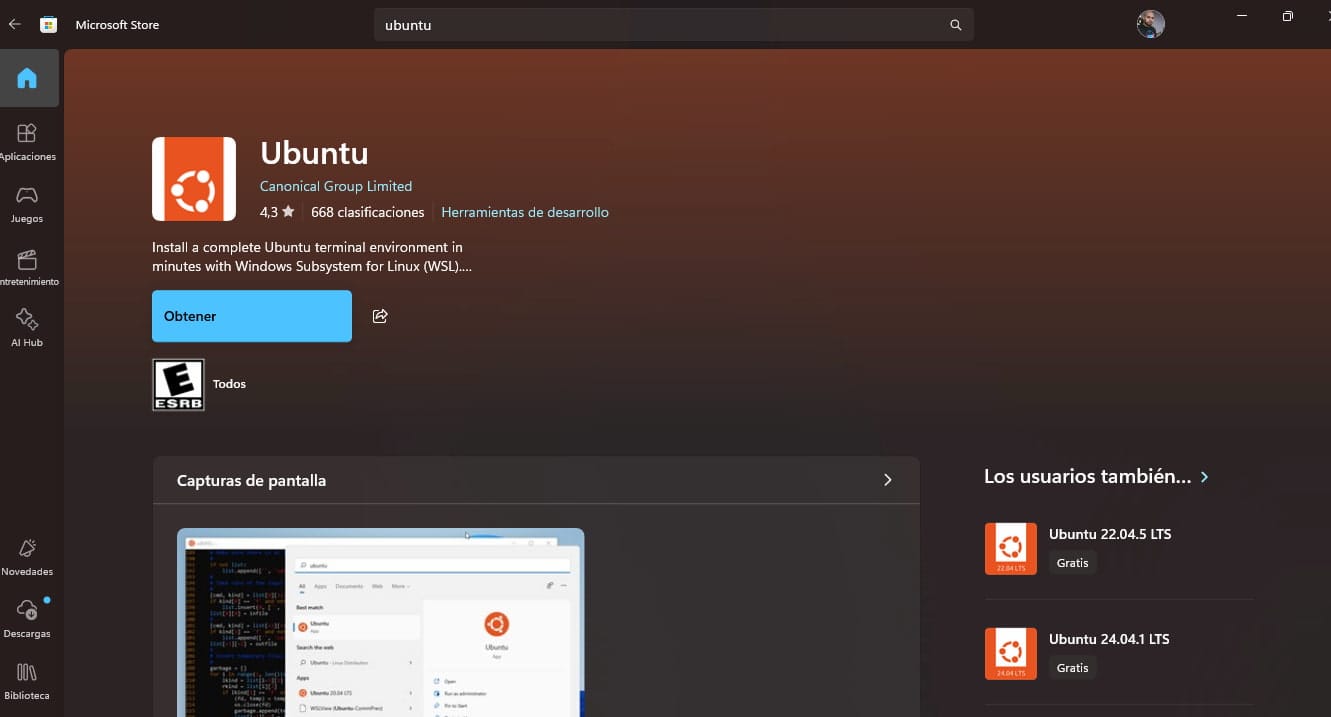
After your computer restarts, installing a Linux distribution is next. You can do this directly through the Microsoft Store.
Open the Microsoft Store and search for one of the available Linux distros—popular options include Ubuntu, Debian, and Kali Linux. You can even find Arch Linux if that’s more your style.
Once you’ve found the distribution you want, just click “Get” or “Install” (whichever shows up) to start downloading it to your system.
Run the Linux distribution.
Once your chosen Linux distribution is installed, you can launch it straight from the Start menu.Just open the Start menu and search for the name of the distro you installed—like “Ubuntu” or “Debian.” Click on it to open.
A terminal window will appear, and the setup will finish automatically. You’ll be asked to create a username and password for your new Linux environment during this process. This account will be used whenever you access the distro within Windows.
Check the WSL version you have installed
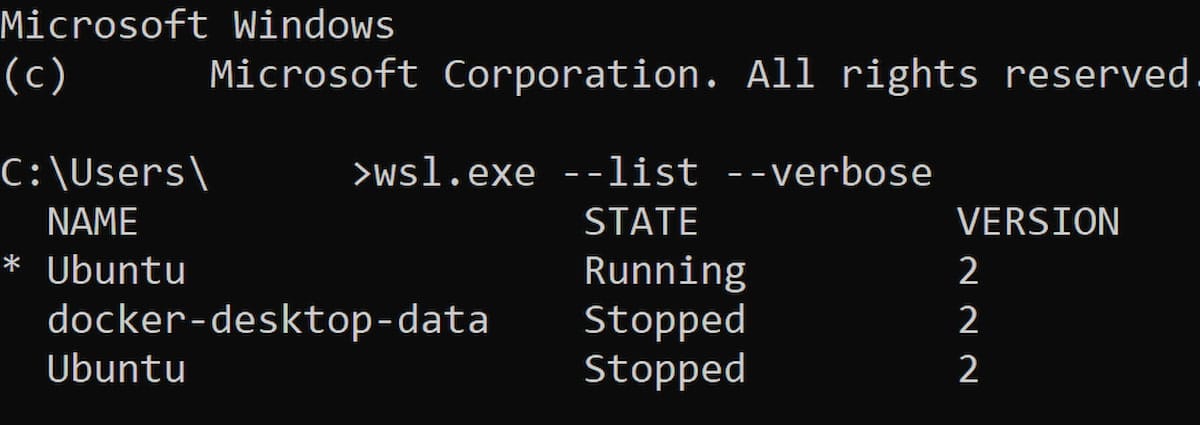
If you want to check which version of WSL is currently installed on your system, just open PowerShell and enter the following command:
wsl --list --verbose
This will display a list of installed Linux distributions along with their WSL version. Look under the “Version” column—if it shows “1” instead of “2,” you’ll need to upgrade.
To set WSL 2 as the default version for future installations, open PowerShell with administrator privileges and run:
wsl --set-default-version 2
And if you want to upgrade a specific Linux distribution that’s already installed, use this command (replacing DistributionName with the actual name, like Ubuntu):
wsl --set-version DistributionName 2
That’s it! Your distro will now be running on WSL 2.
Start using WSL 2 on Windows 11
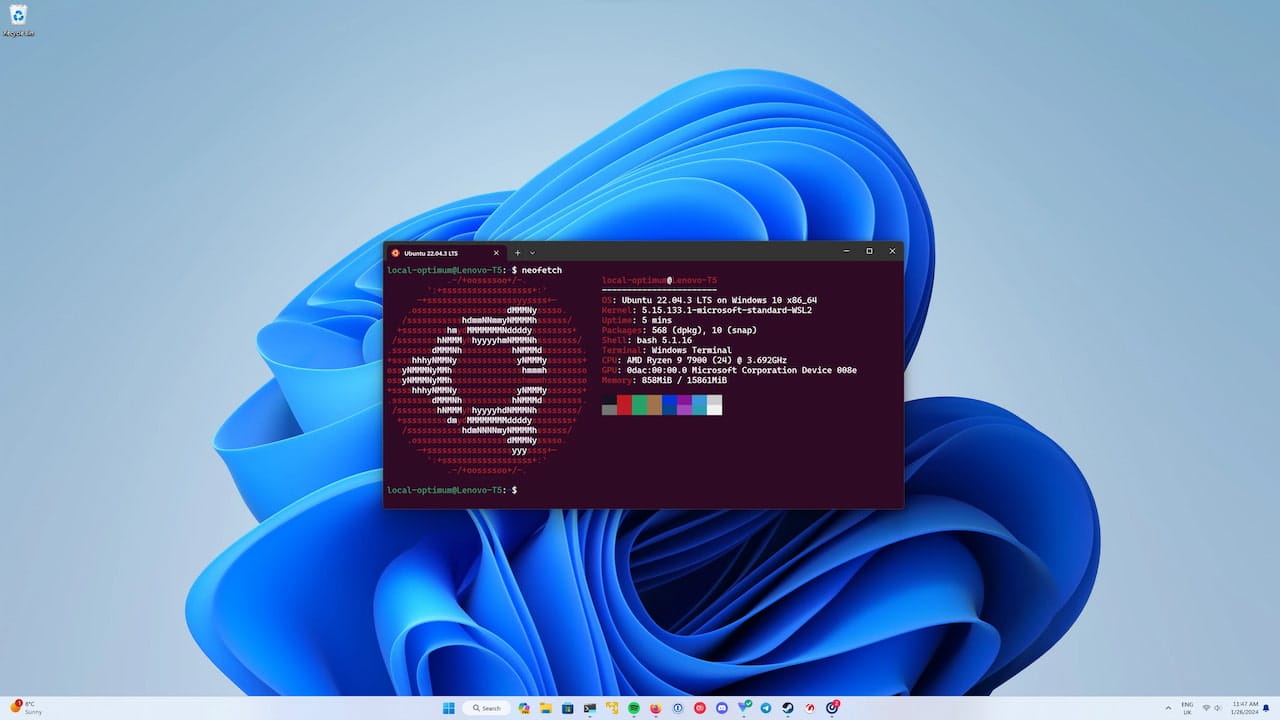
Congratulations if you’ve followed all the steps so far—you’ve successfully installed and set up your Linux distribution on Windows 11 using WSL 2! You can launch it anytime from the Start menu and take full advantage of all the tools and features your Linux environment offers.
If you ever need to access your Windows file system from within Linux, just navigate to it using the path:
/mnt/c/
This lets you browse your C: drive—and you can replace the “c” with any other drive letter to access other drives.
Also, keep in mind that you’re not limited to just one distribution. You can install additional Linux distros from the Microsoft Store if you’d like to explore or test different environments.


