

Microsoft has officially started rolling out the Windows 11 24H2 update to compatible devices. However, if you’re eager to get the update without waiting for the gradual release, you can immediately force the installation and gain access to all the new features and fixes.
Fortunately, multiple methods exist to install the Windows 11 24H2 update manually. Here’s a breakdown of the ways to force this update:
How to install the Windows 11 24H2 update from Windows Update
The most straightforward and reliable way to install a Windows update is through Windows Update in the system’s settings. However, since the rollout of the Windows 11 24H2 update is gradual, you may have to wait a bit for it to reach your device. Luckily, you can speed up the process by following these steps to force the update:
- Open Settings in Windows 11.
- Go to the Windows Update section.
- Enable the option “Get the latest updates as soon as they are available.”
- Click on Check for updates.
- If the 24H2 update appears, click Download and Install.
- Once the download finishes, select Restart Now to complete the installation.
This method preserves all your files, settings, and applications. However, if the update still doesn’t appear after trying this, you may need to explore other methods, such as the Windows Installation Assistant or the Media Creation Tool.
How to install the Windows 11 24H2 update using the installation wizard
Microsoft offers a convenient tool that helps users install and update the operating system efficiently. You can use this tool to install the Windows 11 24H2 update by following these steps:
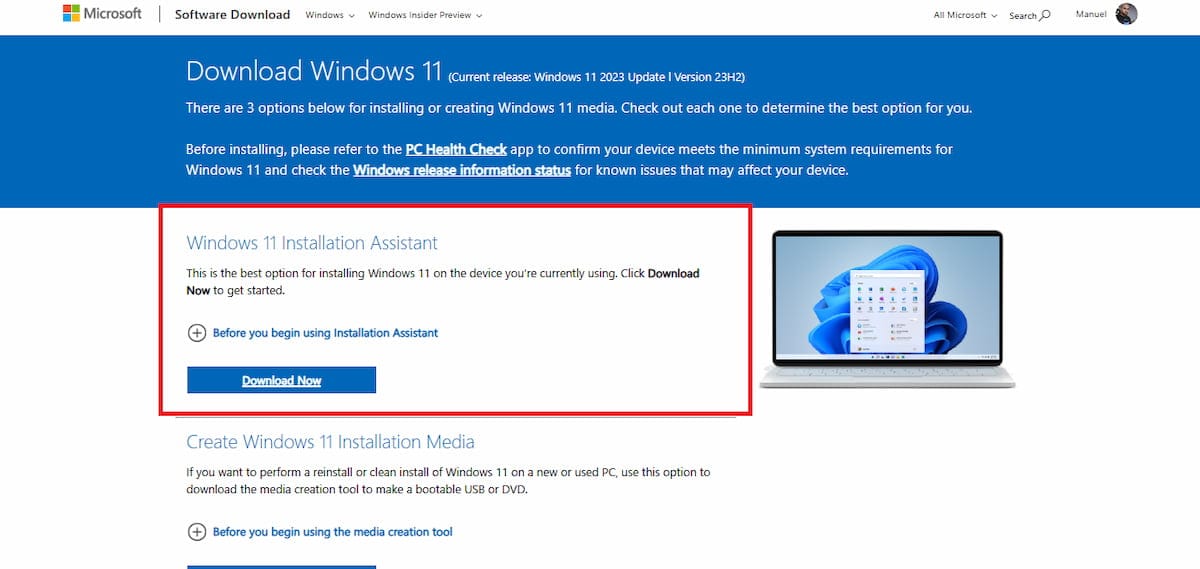
- Visit the Microsoft website to find the Installation Wizard.
- Click on Download now in the Installation Wizard section.
- Once the download is complete, open the executable file.
- Accept the terms and conditions when prompted.
- The Installation Wizard will download all the necessary data and resources for the update.
This method ensures that your data and settings are preserved throughout the installation.
How to install Windows 11 24H2 update from the Media Creation Tool
It is important to note that the Microsoft Media Creation Tool is not for updating your computer but for creating a USB bootable drive and installing the operating system from scratch. Therefore, you can use this method to install the 24H2 version.
How to install Windows 11 24H2 update from an ISO image
If the previous method feels too complex, you can also download the ISO file for the Windows 11 24H2 update and install it manually. Here’s how to do it:
- Visit the Microsoft website.
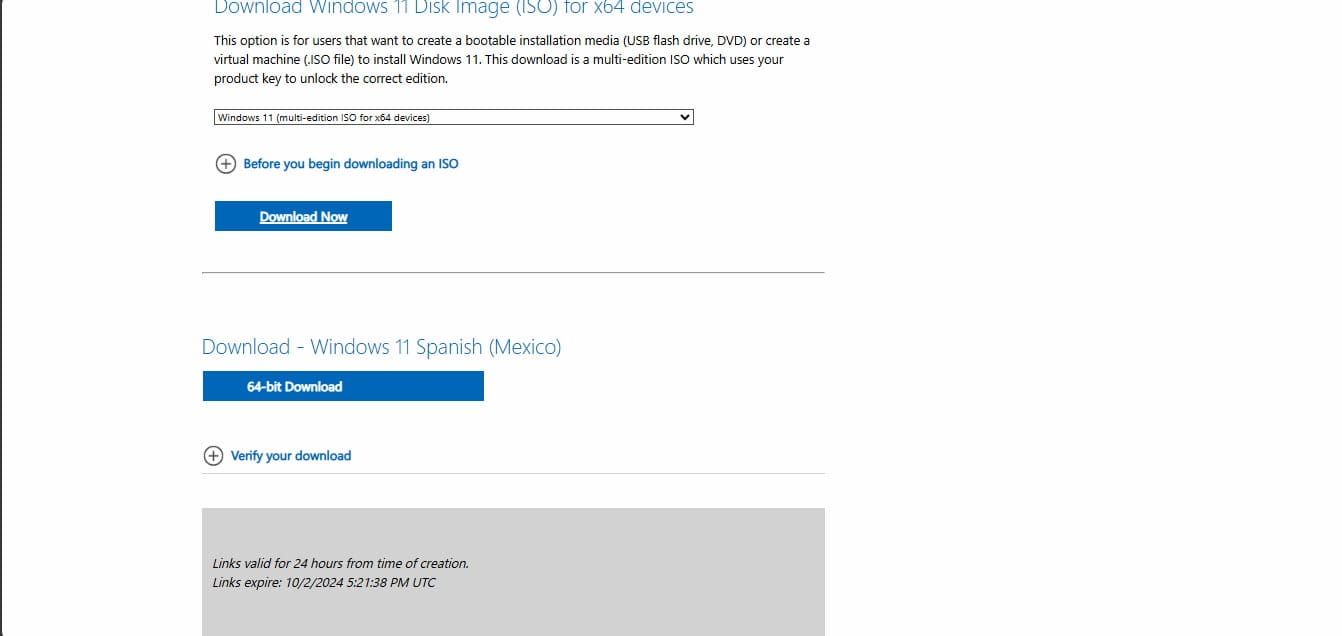
- Click on Windows 11 in the Download Windows 11 Disk Image (ISO) section.
- Click on Download.
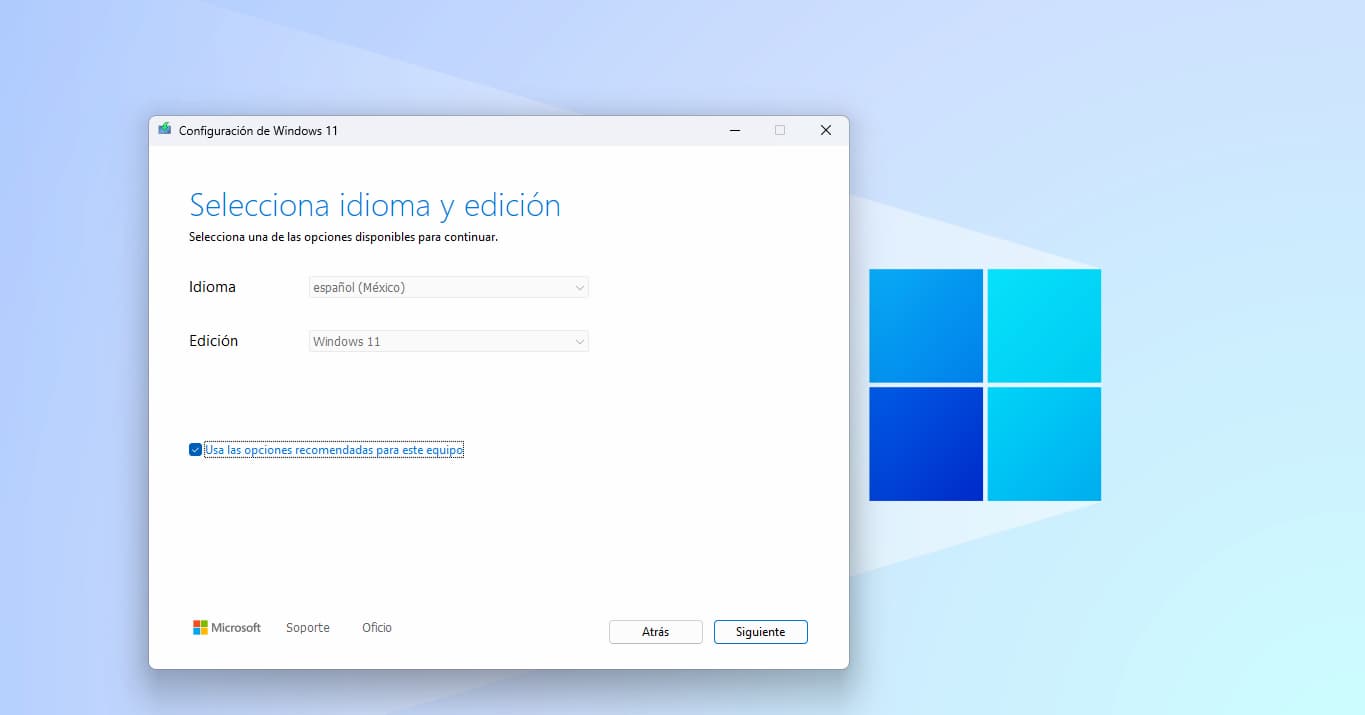
- Select your desired language for the ISO image and choose the 64-bit architecture.
- Once the ISO image has downloaded, locate the file and right-click on it to select Mount.
- Find the corresponding virtual drive for the mounted ISO in the left panel.
- Open the drive and see a list of files and folders. Double-click on setup.exe.
- Accept the terms and conditions when prompted.
- Choose whether you want to keep your files and applications during the installation.
- Click on Install and wait for the installation process to finish.
This method allows you to manually install the update while still retaining your data and applications.


