
Blocking phone numbers on your iPhone is a common practice to avoid unwanted calls and messages. However, there might come a time when you regret blocking a contact and want to reconnect with them. Thankfully, there’s a straightforward solution to unblock contacts directly from the Phone app settings.
If you had a contact previously saved in your phone book and blocked them, you could easily unblock them by accessing the app. However, it can get tricky if you delete the contact or can’t remember which numbers you blocked.
Instead of going through the hassle of changing your cell phone chip, your iPhone offers a simple solution. You can access the Phone app settings, where you’ll find a list of all the blocked numbers that cannot contact you. From there, you can individually unblock each contact based on your preferences.
To help you with the process, we’ve prepared a tutorial on unblocking a contact on your iPhone from the Phone app list. With this guide, you can reconnect with the contacts you previously blocked in a hassle-free way.
How to unblock a contact in Phone settings
1. Open the Settings app. Then tap on “Phone.”
2. Then Open the “Blocked Contacts” section.
3. Drag the desired number to the left and tap the “Unblock” option.
You can also tap the “Edit” button at the top of the screen and unlock multiple numbers faster by tapping the minus (“-“) button and, finally, “Unlock.”
How to unblock a contact in the phonebook
This method is simple and can be more practical if you want to go directly to a specific person on the agenda. To unlock it, follow the steps below.
- Open the “Phone” app on your iPhone.
- Go to the “Settings” tab in the app.
- Look for the section called “Blocked Contacts.”
- You’ll find all the numbers you have previously blocked in this list.
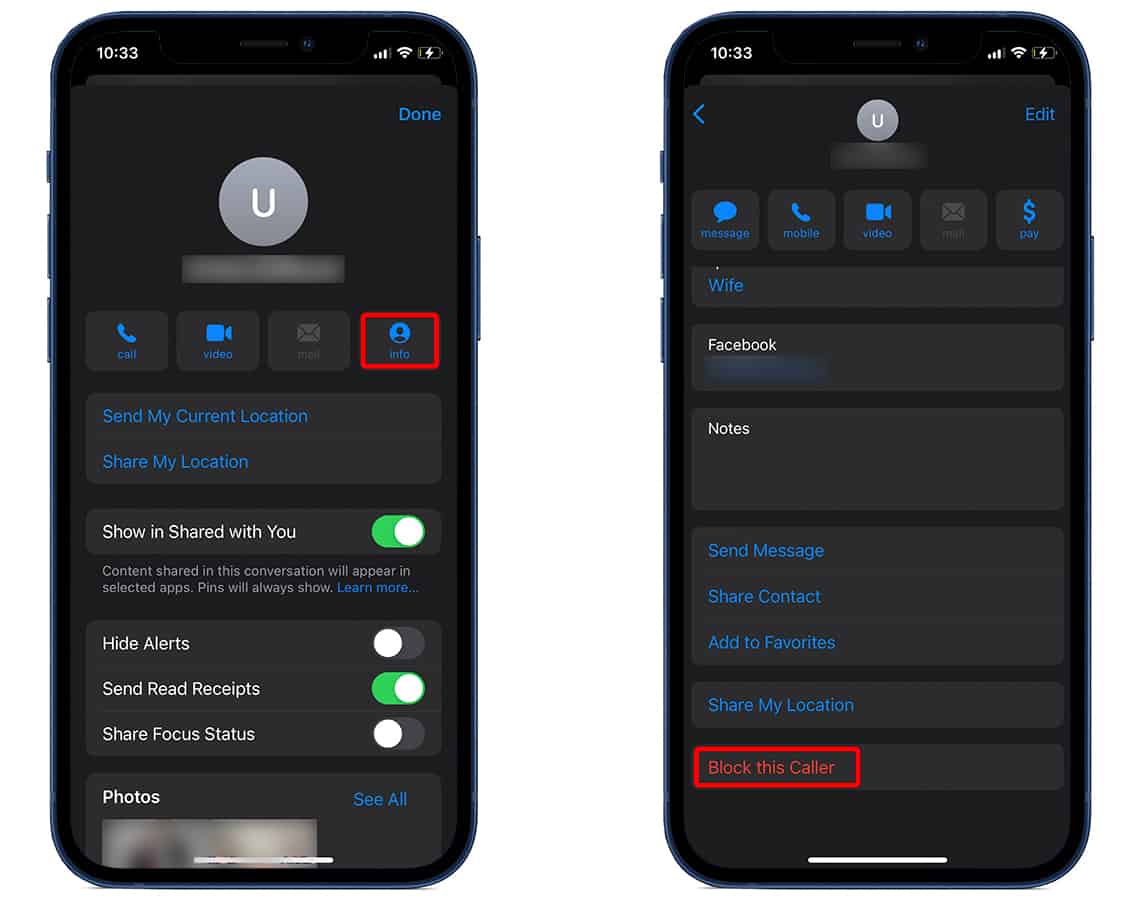
- Locate the contact you wish to unblock and tap on it.
- A new page will appear with details of the contact.
- Scroll down to the bottom of the page and click on “Unblock Contact.”
- Confirm your decision by selecting “Unblock Contact” again.


